Thursday, September 22, 2022

Miniature Tobacco Basket Tutorial

  Hello Mini Friends!  Today I am sharing a piece that I created for American Miniaturist Magazine, Issue 226.  This post will be a little bit different as I have simply copied and pasted exactly what I wrote to go along with the tutorial for the magazine.  So, I am sharing the written steps first and the tutorial pictures after.  It was fun working with American Miniaturist Magazine and I had tutorials appear in Issues 225, 226 and 227 of this year.  I really hope you enjoy this easy Tobacco Basket tutorial and make one (or more!) today!


  Hello mini friends! My husband grew up in Robertson County, Tennessee, where his family were tobacco farmers. Robertson County is known as “Home of the World’s Finest Dark Fired Tobacco.” Years ago, after the tobacco was stripped, they would lay the plants across the handmade baskets, with the plant heads on one side, to present a beautiful display to take to the tobacco auction, showing pride in their beautiful crops. 

 Many farm houses today have heirloom tobacco baskets hanging on their porch and on the walls in their homes as decoration. I thought it would be the perfect addition to my mini farm house to have a tobacco basket hanging somewhere to represent my husband’s family tobacco farming heritage. So, I created one made from cardstock and it wound up being the perfect tiny addition.

  Supplies: one 8x11 sheet of black cardstock, small scrap pieces of cardboard, wood glue or strong craft glue, one disposable plastic cup with a square bottom and brown shades of acrylic paint.

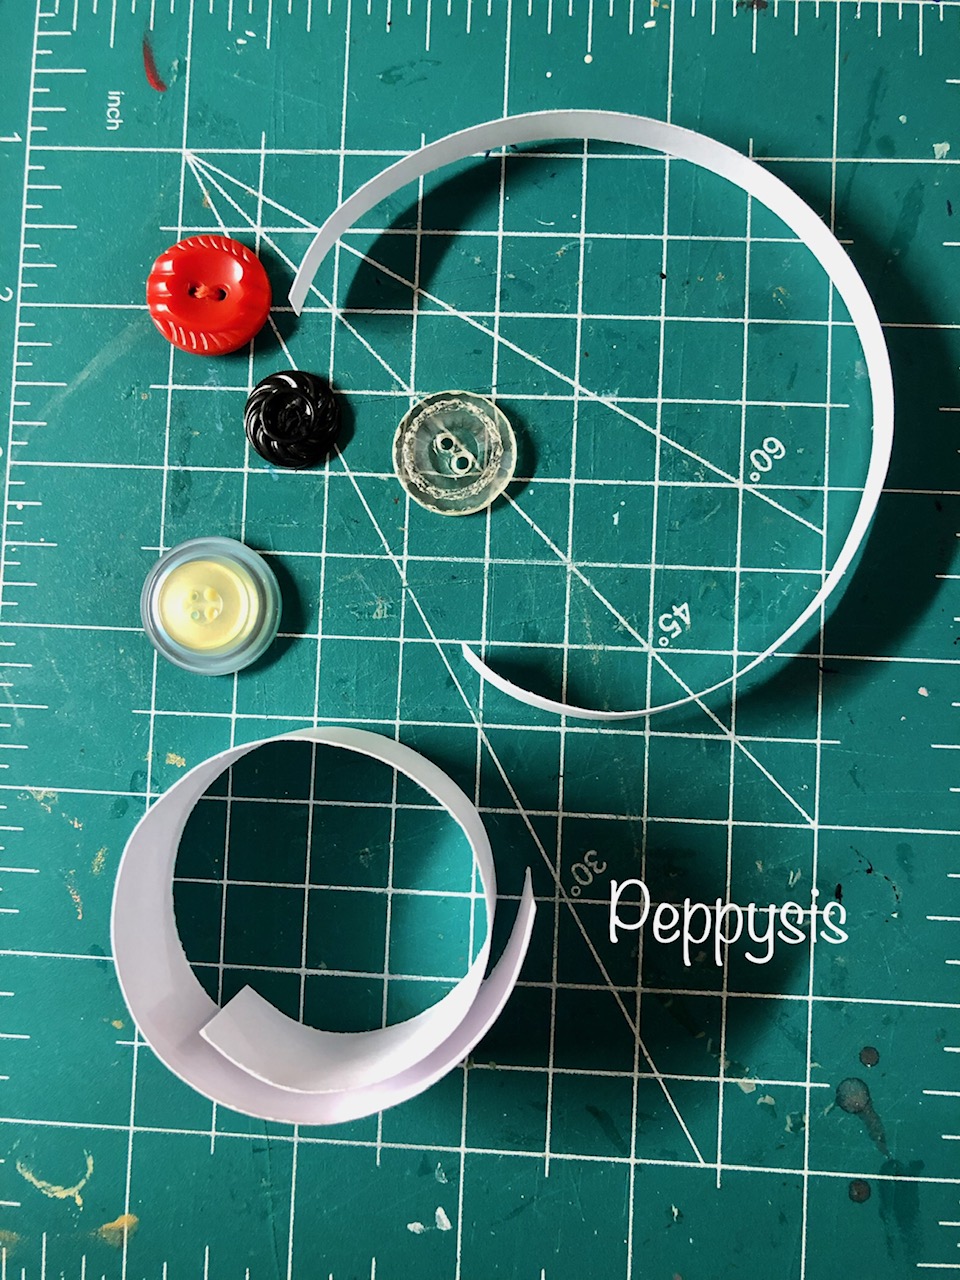
 Step one: using a the piece of black 8x11 inch cardstock, on the 8 inch side, cut four ¼ inch wide strips and cut nine 1/8 inch strips. Cut the nine strips in half. You will wind up having eighteen 1/8 inch wide strips. It is perfectly fine if the pieces aren’t exactly 1/8 of an inch as the real baskets were handmade and none of them were perfect. 

  Step two: using the four ¼ inch wide strips, glue two strips on top of the other two strips (for strength). You will end up having two strips for the main edge of the basket.

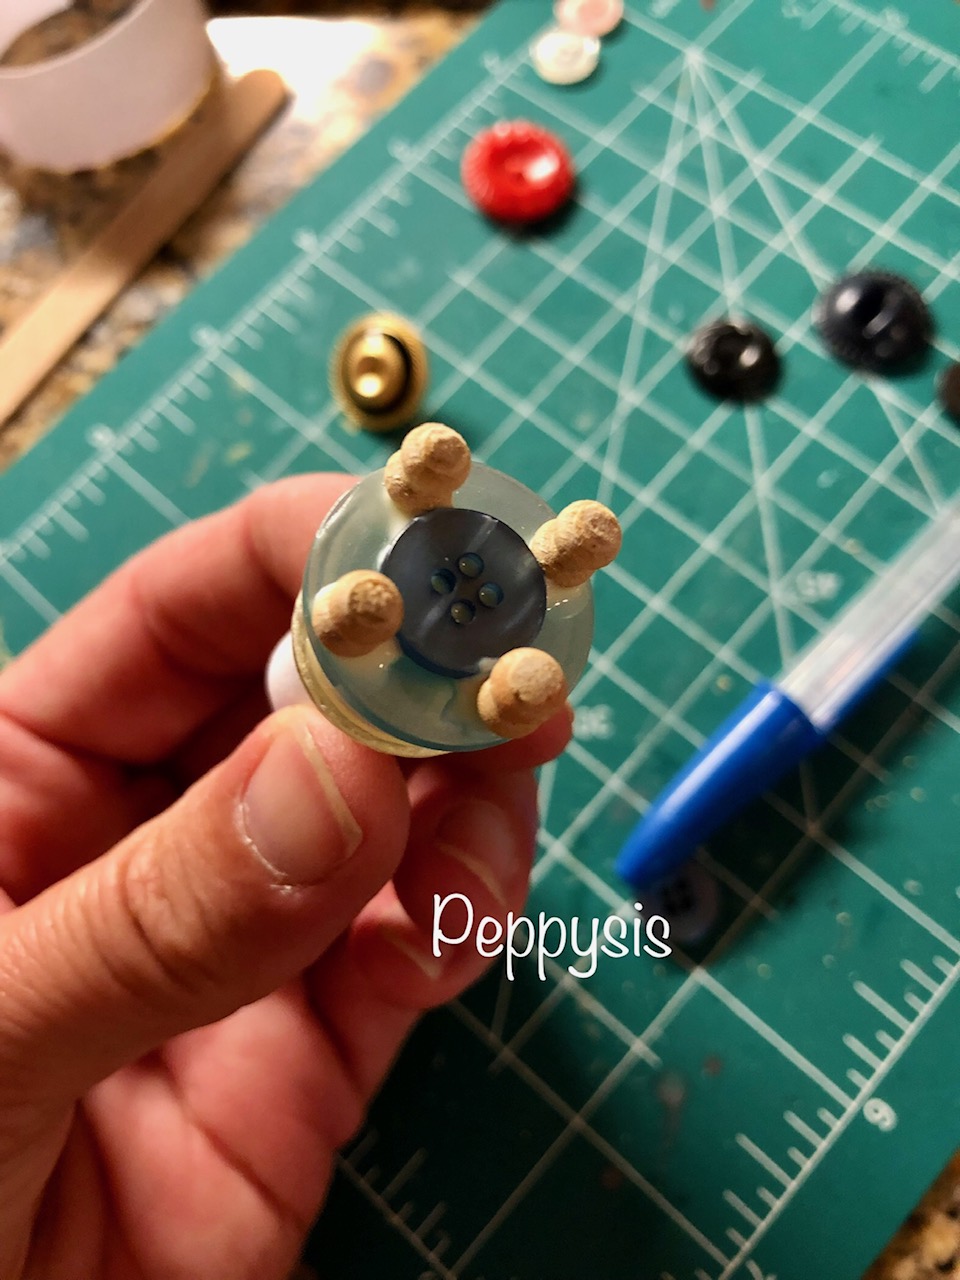
  Step three: turn the plastic cup upside down. The square bottom of the cup will pose as your mold for the basket. Cut scrap cardboard into small squares and tape onto the bottom of the cup so the basket will have a slight dome shape. Using one of the ¼ inch double strips, curve strip with your fingers and bend strip around the base of the cup. Place a dab of wood glue on one end to join the ends on top of each other. Secure with a small paper clip or rubber band and allow to dry.

 Step four: curve the 1/8 inch pieces with your fingers. Beginning slightly off center, place one strip over the basket frame and dab glue on the frame one two sides across from each other. Hold piece in place until it adheres.

  Step five: Turn the cup and place your next 1/8 inch strip the opposite direction, over the first strip and glue on the ends. Continue alternating 1/8 inch strips and gluing, weaving the strips over and under previous strips allowing the glue to dry. You will use only thirteen or fourteen of the four inch strips, depending on how closely the weaving is. You only need to glue the ends as the weave will strengthen the basket.

 Step six: Using the last eight inch double strip, place glue around the outside rim of the basket. Curve the last long strip and place it on the glue, securing the 1/8 inch strips. Use a rubber band to hold in place until the glue has dried. 

  Step seven: Once the glue has dried, remove the rubber band and carefully remove the basket from the cup. Trim the excess of the 1/8 inch strips. Step eight: using four of the remaining 1/8 inch strips, glue strips in a criss-cross square pattern on the inside of the basket. Allow to dry and trim off excess. Step nine: using brown shades such as tan, mushroom and dark brown, lightly brush paints in wood grain directions on strips.


Thank you for joining me today!  I hope this post found you well and was explained just as easy as this little basket is to make.  I actually came up with the idea while I was in my chicken coop.  I usually just use a large cup for their feed scoop and I remember turning around to see the bottom of the cup was square and I thought "hey, that could be used as a square mold for a tobacco basket".  And here we are!

If you like this tutorial please feel free to share the pictures on Pinterest.  If you would like to share anywhere else please ask permission from me.  

Until next time.. XOXO


Thursday, August 18, 2022

Miniature Bread Board Tutorial

 Happy Day Friends!  This tutorial for my bread boards could not be easier!  Simply made of card stock, wood glue and paint.  I love making something that doesn't require dragging out supply after supply.  Honestly, sometimes my crafting area gets to be a huge mess!  Not this time :)  Hope you enjoy!!

Here is what we are making.


And here's how it goes. 

Draw out any shape of bread board that you need.  Some vintage ones are larger than a normal cutting board.  Also, it depends on what you will display on the board.  So here, please use your own judgement on size to fit your own miniature needs.

Draw one and cut it out for your pattern.


Next, trace four more and cut them out.


Glue them together.  I enjoy using wood glue.  I feel that it makes a more solid end result.  Plus, you can sand wood glue which happens to be the next step.  Sand the edges of your bread board.


At this point, you can mark up your board using a pin or tip of a knife.  Just to make indentions to imitate boards or cut marks in the "wood".  


If you wish to make a hole in the handle for hanging, place your board onto a real cutting board and press a sewing pin through the handle to make a hole.


Lastly, on to the painting.  I find it hard to get a good real wood look with paint sometimes.  If you put out different shades of tans and browns and sort of pick up multiple colors with your brush and just thickly paint your board in the same direction you are likely to get the wood look result.


I like to sort of age the edges with either dry brushing dark brown paint or using a brown ink pad.  Just for depth.

Hope you make lots of these!  Please share your creation on Instagram and use the hashtag #peppysis

Also, let's be friends!!  Find me on Instagram at HulseysHideout or click HERE.

I hope you have a wonderful day!


Thursday, August 11, 2022

Miniature Enamelware Skillet Tutorial

 Howdy all!  I call this little skillet enamelware only because I painted mine to look like old enamelware and one graniteware.  And if you know me you already know how much I love enamelware.  So naturally my dollhouse NEEDS it to!  They are very easy to make and fun to display on a dollhouse kitchen stovetop or hanging on a barn wall or a porch even.  Here's how I made them.  But first.. here's what I made.


And here's the supplies needed shot.
They are made from coin battery packaging, a strip of card stock, a sewing pin and paint.


Just cut out the skillet or tray from the battery pack.


make you a tiny hole with the sewing pin for the handle.


I think I may have layered two strips together for the handle and glued them together with wood glue.  Cut your handle shape and fold one end that will attach to your skillet.  Poke a hole with your pin in the middle of the fold.


Then carefully put your sewing pin through the inside of your skillet and through your handle and secure with wood glue.


Set them out to dry and leave them for a little while.


Then paint however your heart desires.  It couldn't be easier folks!


Once your handle is good and dry, snip off the excess pin with some wire cutters.


I went back over mine with clear drying glue to give them a good shine.


Thank you so much for stopping by today!  

XOXO


Thursday, August 4, 2022

Miniature Vintage Oil Heater

 Hi Mini Friends!  While browsing Instagram I noticed an old oil heater in a picture and just loved it.  It only took a few seconds to figure out a miniature replica in my head.  So what to do but get to work!  To make this tiny heater (that doesn't actually heat anything) you will need buttons, card stock, glue (I use my favorite Elmer's Wood Glue) beads or wooden spindle pieces and paint.  Pretty simple!

Here is my tiny heater and the inspiration picture.   


Here is a sample picture of supplies needed.  I wound up not using some of these buttons.  When I got into it I searched for just the right top and middle buttons.  I also cut two strips of card stock, one wider than the other, and curled the paper with my fingers.


When I got the right size, I placed glue throughout the paper so it wouldn't unravel.  Then I glued it on top of the base button.  I first glued a smaller button the base for the paper ring to glue to.


I also glued a small button to the bottom for more security for the legs which I made out of leftover wooden spindle pieces.


I picked a fancier button for the middle that had a little detail around the edge.  Then I took the wider piece of cardstock and repeated the curl and glue.


And I picked out a really fancy button for the top.


I used a sewing pin to carefully poke holes on both sides of the heater for the wire handle to go.  Oh yeah... you'll need a small piece of wire too.  Just whatever you've got that's easy to work with.


I gave her a good base coat of chalk paint before I painted with craft paints.


I also made a slightly larger one.  At first I painted the larger one with grays and metallics but didn't really like it.


This was the inspiration picture for the larger heater.  I found it on Pinterest.  I admit I didn't want to paint the "vent" detail.  I tend to shy away from things that could possibly frustrate me lol.  So, I found some tiny lace and painted it and hoped for the best.  


Turns out I really like them both!!  I cut a tiny piece of cardstock for the little door and glued lace on it also.


I really hope you like my little oil heaters.  They are very easy to make and add a bit of character to my rooms.  

Thanks so much for stopping by today!  Check out my list of miniature tutorials HERE.

XOXO