Showing posts with label basket. Show all posts

Thursday, September 22, 2022

Miniature Tobacco Basket Tutorial

  Hello Mini Friends!  Today I am sharing a piece that I created for American Miniaturist Magazine, Issue 226.  This post will be a little bit different as I have simply copied and pasted exactly what I wrote to go along with the tutorial for the magazine.  So, I am sharing the written steps first and the tutorial pictures after.  It was fun working with American Miniaturist Magazine and I had tutorials appear in Issues 225, 226 and 227 of this year.  I really hope you enjoy this easy Tobacco Basket tutorial and make one (or more!) today!


  Hello mini friends! My husband grew up in Robertson County, Tennessee, where his family were tobacco farmers. Robertson County is known as “Home of the World’s Finest Dark Fired Tobacco.” Years ago, after the tobacco was stripped, they would lay the plants across the handmade baskets, with the plant heads on one side, to present a beautiful display to take to the tobacco auction, showing pride in their beautiful crops. 

 Many farm houses today have heirloom tobacco baskets hanging on their porch and on the walls in their homes as decoration. I thought it would be the perfect addition to my mini farm house to have a tobacco basket hanging somewhere to represent my husband’s family tobacco farming heritage. So, I created one made from cardstock and it wound up being the perfect tiny addition.

  Supplies: one 8x11 sheet of black cardstock, small scrap pieces of cardboard, wood glue or strong craft glue, one disposable plastic cup with a square bottom and brown shades of acrylic paint.

 Step one: using a the piece of black 8x11 inch cardstock, on the 8 inch side, cut four ¼ inch wide strips and cut nine 1/8 inch strips. Cut the nine strips in half. You will wind up having eighteen 1/8 inch wide strips. It is perfectly fine if the pieces aren’t exactly 1/8 of an inch as the real baskets were handmade and none of them were perfect. 

  Step two: using the four ¼ inch wide strips, glue two strips on top of the other two strips (for strength). You will end up having two strips for the main edge of the basket.

  Step three: turn the plastic cup upside down. The square bottom of the cup will pose as your mold for the basket. Cut scrap cardboard into small squares and tape onto the bottom of the cup so the basket will have a slight dome shape. Using one of the ¼ inch double strips, curve strip with your fingers and bend strip around the base of the cup. Place a dab of wood glue on one end to join the ends on top of each other. Secure with a small paper clip or rubber band and allow to dry.

 Step four: curve the 1/8 inch pieces with your fingers. Beginning slightly off center, place one strip over the basket frame and dab glue on the frame one two sides across from each other. Hold piece in place until it adheres.

  Step five: Turn the cup and place your next 1/8 inch strip the opposite direction, over the first strip and glue on the ends. Continue alternating 1/8 inch strips and gluing, weaving the strips over and under previous strips allowing the glue to dry. You will use only thirteen or fourteen of the four inch strips, depending on how closely the weaving is. You only need to glue the ends as the weave will strengthen the basket.

 Step six: Using the last eight inch double strip, place glue around the outside rim of the basket. Curve the last long strip and place it on the glue, securing the 1/8 inch strips. Use a rubber band to hold in place until the glue has dried. 

  Step seven: Once the glue has dried, remove the rubber band and carefully remove the basket from the cup. Trim the excess of the 1/8 inch strips. Step eight: using four of the remaining 1/8 inch strips, glue strips in a criss-cross square pattern on the inside of the basket. Allow to dry and trim off excess. Step nine: using brown shades such as tan, mushroom and dark brown, lightly brush paints in wood grain directions on strips.


Thank you for joining me today!  I hope this post found you well and was explained just as easy as this little basket is to make.  I actually came up with the idea while I was in my chicken coop.  I usually just use a large cup for their feed scoop and I remember turning around to see the bottom of the cup was square and I thought "hey, that could be used as a square mold for a tobacco basket".  And here we are!

If you like this tutorial please feel free to share the pictures on Pinterest.  If you would like to share anywhere else please ask permission from me.  

Until next time.. XOXO


Friday, January 11, 2019

Movies and Miniatures

Two of my favorite things.  Sometimes done together... sometimes not.  I have favorite movies that I love to watch, at my kitchen work area, that I have seen a hundred times and some that I've only just rented from the library.  Sometimes I am painting a newly made mini and sometimes I create on inspiration.  And sometimes my minis start one way and take on the affect of what I'm watching... leading me to always remember what movie was on while I made a piece.

This piece was an idea I had while at work, partly.  The side table here I made while watching Pirates or the Caribbean.  Which I think gave it a more nautical look when finished.  The first picture shown.. its not quite finished.  The candle does light up and flicker.  I've been thinking about that part for months.  This is just my first one.


This photo is taken in my new roombox.  I made it while watching Alice in Wonderland (Johnny Depp version).
Every piece seen here was handmade by me... except the tiny flowers on the wall... Jesus made those.

This little basket I made last night while watching The BFG (big friendly giant).  I can't believe I've not seen this movie! (Or made a teeny basket like this before)  I woke this morning at 4:37 thinking about coloring some sawdust that I got from my Dad's woodshop for moss.  So I got up, colored it, and glued it on.  Such a difference!!  I love it :)


This picture is also in my roombox.  The roses I found just yesterday at Hobby Lobby.  They had several colors and seeing as how I'm not good at making flowers (yet) I was tickled to find them.  The basket I've had for years and the table I made.


I love and mossy look so much.  I also added it to my fireplace this morning.  I couldn't help myself.


Yes.. I've missed you too... terribly.  Let's not get into the where, how or whys.  :)


Yours Truly,
Laurie

P.S. I am on Instagram... hulseylaurie… you can see my candle in action there.  xoxo


Friday, April 3, 2015

easter basket dreams 2015

Lemon Satin Cremes  ~  Ethel M
Gorgeous Minnetonka Sandals  ~  Zappos
Pheonix Flowy Tank  ~  Sevenly

And how to cut off jeans into shorts which I totally plan on doing to some of my jeans that are too short but still fit great... mainly some Levis.


Friday, October 3, 2014

root baskets

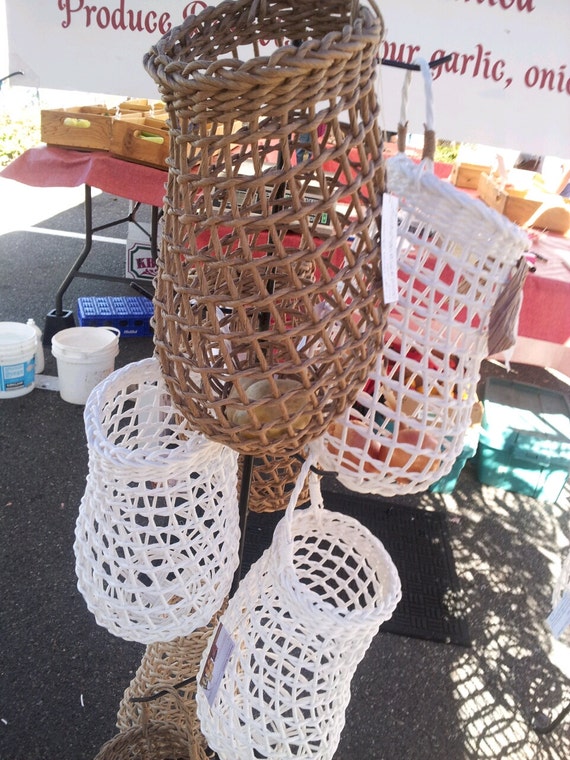
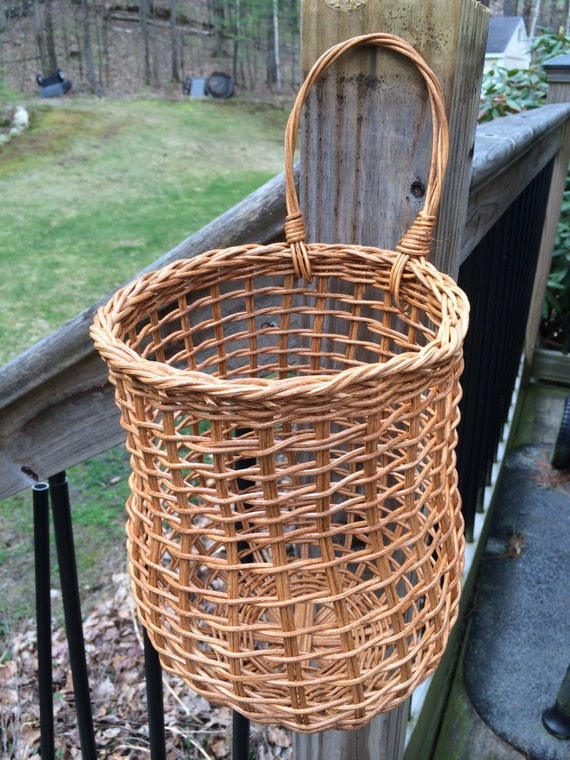
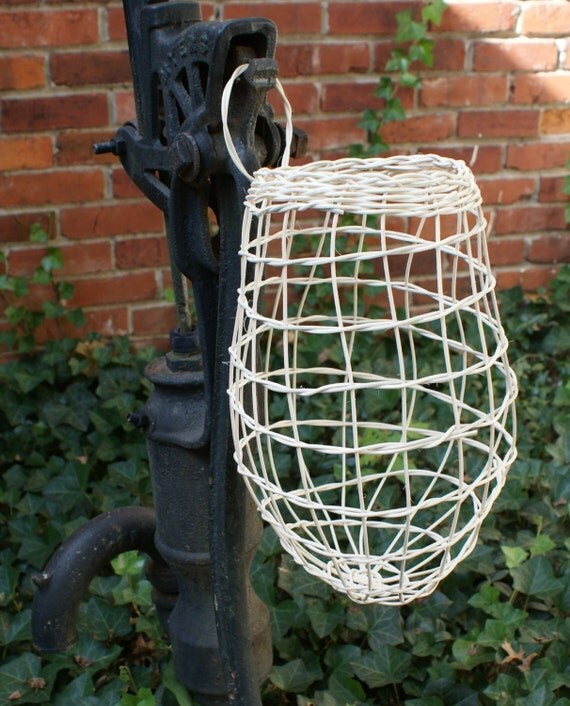
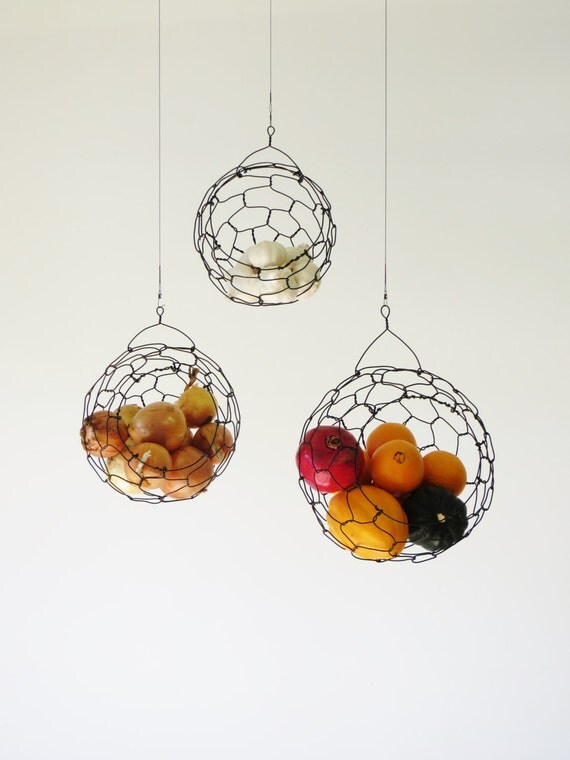
Root Basket - hanging basket that holds root vegetables such as garlic, onions and potatoes.  There's the old fashioned wire kind, of which i have and use as a planter, and then there's the handmade, hand woven kind.  These have got me drooling just a touch.  Enough so that I plan to check and see if I can hang the wire one that I've got in my pantry so as it's out of the way enough.  If not, these are always an option and they hang on the wall.  I truly feel that I only need one to use for my garlic that didn't get braided this Summer.  I simply want to cut the stems and roots and store them in something airy and big enough.  The original "root basket" that I found is sold out.  I have found the following from Amazon to Etsy.


CO_Garden_RootBasket_07.jpg


Wire storage baskets hanging on a branch, drying flowers and herbs, coffee/tea bar and photos!
Then again... I could hang wire baskets from my herb drying stick across the sink.  It doesn't get much light.
Pic found on pinterest


Hanging Wire Fruit or Vegetable Sphere Basket Set

Alas... I will try to make do with what I've got.  These pictures sure have given me some good ideas.  I wonder if there's a tutorial on youtube... hmmmm.

Wednesday, April 16, 2014

easter basket dreams 2014

Well y'all... I think the Easter bunny thinks I have grown up.  And that's Ok.  But if he were to leave a present on my door step... and I don't mean bunny pellets... here's what they might look like.


Aaah... where to begin.  Some of these things have been favorites of mine for simply years.  The Ethel M Lemon Satin Cremes hold the record for the longest in loves.  I first has them when I was 23 and have ordered some from time to time.. even came up with my own recipe (imagine that).  They are the ultimate in dark chocolate and lemon.  Two of my faves.

The sunglasses are a Walmart $5.00 special.  I like cheap sunglasses because if they scratch you just go get another pair!

Country Living British Edition.  I pick it up from time to time.  It fascinates me to see home trends, gardening and such from the UK although the recipes confuse me.

Another product of the UK, Cath Kidston roll of stickers.  I want these.  Can I say that again?  I... want... these.  I own this sticker book and they are almost gone.  I have used them when canning, wrapping presents, mailing things... the list goes on!  And I need more. 

And finally... stain, elastic hair ties.  I bought one and only one at the barn sale last weekend and I simply love it.  I get so tired of regular hair bands stretching out and that seems to be all I can find in my home...  stretched out ones!  Until this little baby came along.  It holds my hair in a bun or pony tail nicely without being too tight yet holding it in place.  And they say it doesn't leave pone marks on your hair.  You can find them all over Etsy.  I have satin elastic on my list to stop and buy this weekend to make my own.  I have to have more!

Happy Early Easter!  It's only this Sunday!  What are a few of your favorite things that you'd grin ever so loudly at in your Easter basket?

Tuesday, May 28, 2013

Hanging Basket Planter

An old, or new, vegetable/fruit hanging basket in the "trio" style is such a cute way to pot summer plants.  I made this one a couple of years ago.  The most difficult part is cutting and wiring in the coconut matt.  I cut my pieces and wedged and pushed them into place then used wire to push through and twist to hold the matt in place.  It has worked great!  The first year I had Ivy in the top basket so it would trail down.  This year I chose to use Begonias since they handle shaded area of my porch well. 


2010 Version.
 

Tuesday, May 21, 2013

A Treasury

Treasury lists are very popular on Etsy.com.  Our bathtub caddy has been in quite a lot, which is fantastic and good exposure.  When you are on the first page of the site, you can scroll down and on your left you will find Treasury.  They are compilations of found items on etsy with a common denominator such as... navy blue, spa time or beachy, and you can submit them and they sometimes find their way to the front page.  Which I love to be a part of. 
 
Here is a Rustic Chic treasury I made to share with you.  It is much like my four fanciful things series that comes about on Fridays but I still love to share things that I find with you.  I feel you fancy it as well.  Thanks to you for your time and attention.  ~xo


Friday, May 17, 2013

four fanciful things: world market style

I am a World Market fan... big time!  It is the only place that I will buy olive oil and i know if I can't find a good price on spices, I can there.  I love what they have to offer in home decor as well.  Matter of fact I just happened on their website this morning and chose four fanciful things to share with you in a heartbeat of a hummingbird. 


Thursday, March 28, 2013

Easter Basket Dreams

If the Easter Bunny were to come to my house this Sunday
and leave an Easter Basket full of goodies for me....
here's what I dream they'd be.
 
 
1  2  3  4